I. How to Import Data from Calc to Base?I. Open a Base file of the database type that you want. ...2. Open the Calc file that contains the data to be imported to Base. ... 3. Select the data to be copied to Base. ... 4. Choose Edit - Copy. 5. In the Base window, click Tables to view the tables. 6. In the Base window, choose Edit - Paste. II. HOW TO CONSOLIDATE DATA IN CALC?To Combine Cell Contents 1. Open the document that contains the cell ranges to be consolidated. 2. Choose Data - Consolidate to open the Consolidate dialog. 3. From the Source data area box select a source cell range to consolidate with other areas. ... 4. Click Add to insert the selected range in the Consolidation areas field. III. Prepare a document in MS-Word - use find and replace text - use spell check and Auto correct - generate table of contents - index for a documentPrepare a document in MS-Word - index for a document1. Open a Microsoft Word document. ... 2. Click the References tab. ... 3. Click the Mark Entry button. ... 4. Select a word or a group of words for your index. ... 5. Click on the Mark Index Entry dialogue box. ... 6. Format the page numbers in your index. ... 7. Format the text for your index entry. ... 8. Click Mark. Create Table of Contents 1. Start Word, and then open your document. 2. Click an empty paragraph where you want to insert the TOC. 3. On the Insert menu, point to Reference, and then click Index and Tables. ... 4. Click the Table of Contents tab, and then click Show Outlining Toolbar. IV. Use mail merge facility for printing mailing labels in Open office – Writer.To print mailing labels:1. Click File > New > Labels. 2. On the Options tab, ensure that the Synchronise contents checkbox is selected. 3. On the Labels tab, select the Database and Table. Select the Brand of labels to be used, and then select the Type of label. If the type of label you wish to use is not on the list, you need to use the Format tab to define a new Brand and Type. This is beyond the scope of this document, but is relatively simple to implement, given knowledge of the dimensions of the label. Select Database, Table, label Brand, and label Type. . 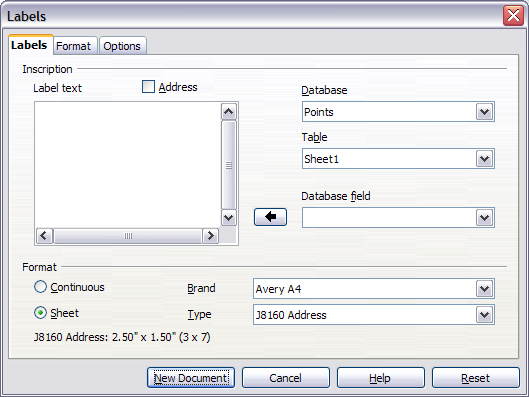 4.Click the dropdown arrow under Database field. Select the first field to be used in the label (in this example, Title). Click the left arrow button to move this field to the Label text area. Move fields from Database field list to Label text area.  Move fields from Database field list to Label text area. 5. Continue adding fields and inserting desired punctuation, spaces, and line breaks until the label is composed. The figure below shows the completed label. 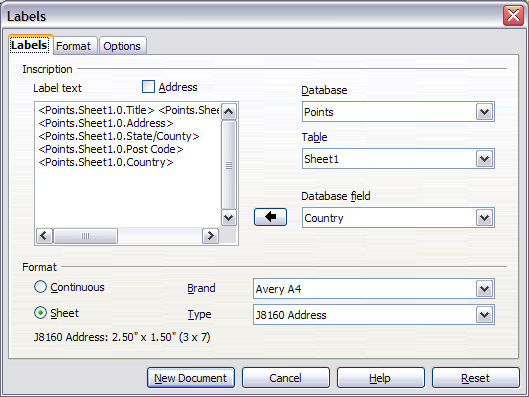 The completed label. 6. Click New Document. You now have a new, single page document containing a series of frames, one for each label of the selected type and filled with the data source address fields that you selected. Quite often some of the fields in your address data source will be unused, leading to blank lines in your labels. If this is not important, you can skip the next few paragraphs and go straight to Step 7, otherwise continue as described here. a. First ensure that the label frames are showing the field contents (data source headings), rather than their underlying field names. If this is not the case, then either press Ctrl+F9 or select View>Field Names to toggle the view. b. Next, ensure that you can see non printing characters, such as paragraph marks, line breaks and so on. If these are not already visible, select View > Nonprinting Characters from the menu bar, or press Ctrl+F10, or click on the paragraph icon in the Standard toolbar. You will now see that address field separation is created by line breaks , rather than paragraphs . As the suppression of blank address fields depends on hiding paragraphs, not lines, you need to replace line breaks with paragraphs as follows. c. Click in the first label, at the end of the last data source address field in the first line of the label. Press Delete to remove the new line character and then press Return (or the Enterkey) to insert a paragraph marker. Repeat this action for each line in the address. If the line spacing in the first label is not satisfactory, you may wish to correct this before proceeding, by modifying the paragraph style associated with the address. Unless you have changed it, the address uses the Default style. The objective of step c) is to replace all line breaks at the end of data source address fields with paragraphs. Sometimes the address data field may be longer than the width of the label and will wrap to the next physical line: make sure that you are not misled by this into deleting and replacing anything other than line break characters. d. Click again at the end of the first paragraph to be conditionally suppressed and then select Insert > Fields > Other. Select the Functions tab and then click on Hidden Paragraph in the Type column. Now click in the Condition box and enter the details of the condition that defines a blank address field. It has the general form of: ![Database.Table.Database field] where the ‘!’ (NOT) character indicates the negative case and the square brackets indicate the condition. For example, in our Points database the condition to test if the Company field is empty would be ![Points.Sheet1.Company] as illustrated in Figure 12. To test for multiple conditions, use the operators AND and/or OR between the conditional statements, for example: ![Points.Sheet1.Title]AND![Points.Sheet1.Last Name] Click Insert, but do not close the dialog until all lines have been amended. e. Repeat for each paragraph to be conditionally suppressed, remembering to advance the cursor to the end of the line in question before changing the last element of the condition and Inserting the result. The last paragraph of the label address block ends with a special field, Next record:Database.Table (Next record:Points.Sheet1 in our example), and the Hidden paragraph field MUST be inserted before this field. This can generally be accomplished by clicking at the end of the paragraph and then using the Left Arrow key once to skip back over it. A clue that you omitted this action is the observation that some records have been skipped and are missing from the final output. f. Remembering that we selected Synchronise contents earlier, you should now be able to see a small window containing a button labelled Synchronise Labels. Click on this button and the hidden paragraph fields are propagated to all the labels in your document. You now have a template suitable for future use with the same data source and type of label. If you wish to save it, use either File > Templates > Save as, or save it as an Open Document Text Template (.ott) into the private template directory (folder) that you have previously defined in Tools > Options > OpenOffice.org > Paths > Templates. The labels are now ready to be printed 7. Click File > Print. In the message box that appears, click Yes. 8. In the Mail Merge dialog, you can choose to print all records or selected records. To select records to be printed, use Ctrl+click to select individual records. To select a block of records, select the first record in the block, scroll to the last record in the block, and Shift+click on the last record. 9. Click OK to send the labels directly to the printer. If you prefer to save the labels to a file, perhaps to allow some later editing such as changing the typeface or paragraph format, then you should select File in the output section of the Mail Merge dialog box, rather than using the default Printer selection. This changes the dialog box to highlight the Save merged document section, where Save as single document is preselected. In this case, clicking OK brings up the Save as dialog box, where a file name can be entered for the saved labels. If you did not save the prototype label fields document (template) in step 6f, then you are prompted to do so now by another Save as dialog box. In either case, whether printing or saving to file, despite there apparently being only one page of labels, the printed or saved output will be expanded to include all of the selected records from the data source. ------------------------------------------------------------------------------------------------------------------------------------------------------------------------------------------- V. Print envelopes with from addresses and to addresses using Mail-merge . Use mail merge facility for sending a circular letter to many persons. Use mail merge facility for printing mailing labels in MS-Word.Step 1: Set up your mailing list The mailing list is your data source. It can be an Excel spreadsheet, a directory of Outlook contacts, an Access database, or an Office address list. It contains the records Word pulls information from to build the addresses to be printed on the envelopes. Tips • If you don’t have a mailing list, you can create one during mail merge. Before you start the mail merge process, collect all of your address lists, and add them to your data source. • If you're using an Excel spreadsheet, make sure the column for ZIP Codes or postal codes is formatted as text so that you don't lose any zeros. For more information see Format mail merge numbers, dates, and other values in Excel • If you want to use your Outlook contacts, make sure Outlook is your default email program. Step 2: Test your envelope layout A preliminary step in the mail merge process is to set up the envelope for the merge. It's always a good practice to run a small test batch of envelopes before you do a real mail merge. Note: If you're comfortable with printing envelopes on your system you can skip to step 3. 1. In Word, choose File > New > Blank document. 2. On the Mailings tab, in the Create group, choose Envelopes. 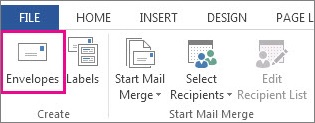 3. In the Delivery address box, type a sample address to test how an envelope will look when it's printed.  Note: The sample address won't show up in your mail merge. 4. In the Return address box, type your address.  5. Choose Options > Envelope Options and do the following: In the Envelope size drop-down list, choose the size that matches your envelope or choose Custom size.  Note: If you choose Custom size, enter the envelope dimensions in the Width and Height boxes. Choose OK when done. Under Delivery address and Return address, choose a font and the left and top offset position for each address. Note: Based on the preview of the envelope layout, make any necessary adjustments to your choices. VI. On the Printing Options tab, confirm the correct Feed method is selected, load the envelope to match the illustration, and then choose OK.
Note: Your printer sends Word information about which way the envelope should be loaded in the printer. This information appears under Feed method. VII. Choose Print, and then choose Yes to save the return address as the default address.
Note: If the envelope printed correctly, congratulations, you're ready to go to the next step in the mail merge process. If the envelope didn't print as you expected, go back to step 5 and readjust the envelope layout options and the Form Feed options as necessary.
Step 3: Start the mail merge 1. On the Mailings tab, in the Start Mail Merge group, choose Start Mail Merge > Envelopes. 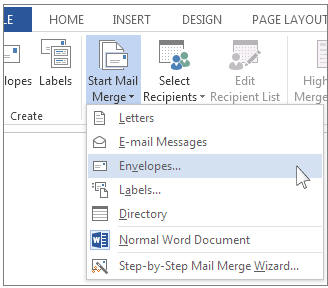 2. In the Envelope Options dialog box, set up the envelope by choosing options as in Step 2: Test your envelope layout, and then choose OK. Note: Word creates a document that’s sized to the envelope dimensions and shows where the return address appears on the envelope. 3. If you'd like to add a return address, or logo, to your envelope now is a good time to add that. 4. Choose File > Save, and add a file name. Step 4: Link your mailing list to your main document Now you're ready to open the data source for your mailing list. 1. On the Mailings tab, in the Start Mail Merge group, choose Select Recipients, and then choose an option.  \ 2. Do one of the following: o If you don’t have a mailing list, choose Type a New List and create one. or o If your mailing list is in an Excel spreadsheet, an Access database, or another type of data file, choose Use an Existing List. Then browse to your list and choose Open. or o If you’re using your Outlook contacts, choose Choose from Outlook Contacts. 3. Choose File > Save. Edit your mailing list If you’re printing envelopes for everyone on your list, go to Step 5: Add the address block to the envelope. If you want to print envelopes for people on your list who live, for example, within 20 miles of an event you're hosting, then use a filter like a ZIP Code or a postal code to narrow the list. For more information on filtering your data see Sort and filter the data for a mail merge. Tip: You may find it useful to use the filter feature to filter out contacts for whom you don't have a postal address. That way you don't waste envelopes that you won't be able to mail. To choose individual people on your list that you would like to create envelopes for, do the following: 1. Choose Edit Recipient List. 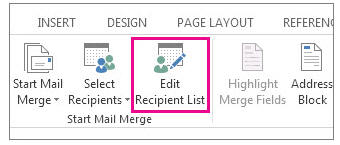 2. Check the names of the people who you want to receive your mailing. 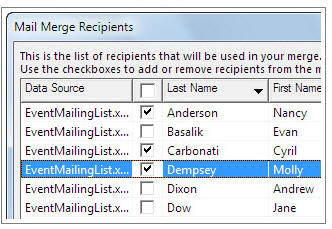 You also can sort or filter the list to make it easier to find names and addresses. Step 5: Add the address block to the envelope The address block is a mail merge field. Also known as a placeholder, you use the merge field to mark the place where you want addresses to appear on the envelope. Note: It's often easier to properly align the address block if you turn on displaying paragraph marks (¶) first. To turn them on go to the Home tab of the Ribbon and click the Show /Hide ¶ button or press CTRL+SHIFT+8. 1. Place your cursor were you want the address block to go. If you have show paragraph marks turned on, click immediately after the paragraph mark (¶) that Word has placed in the middle of the envelope. 2. On the Mailings tab, in the Write & Insert Fields group, choose Address Block. 3. In the Insert Address Block dialog box, choose a format for the recipient's name as it will appear on the envelope. Note: Under Preview, choose the Next or Previous record button to move through records in your data source and view how an address will appear on the envelope. 4. Choose OK. 5. Choose File > Save to save your merge document before proceeding. Verify merge field names Make sure Word puts the names and addresses from your mailing list in the right places on your envelope. 1. On the Mailings tab, in the Write & Insert Fields group, choose Match Fields. 2. In the Match Fields dialog box, the column on the left are the field names that Word uses in an Address Block. The column on the right lets you match up fields in your data source to those field names. Verify that the field names that appear on the left side match the names of column headings for records in your mailing list so Word can put the correct data in the correct place on your envelope. 3. Do one of the following: o If the field names shown match column headings you used for records in your mailing list data source, do nothing. or o If (not matched) appears in a field name that you expected to match a column heading in your data source, choose the drop-down arrow, and then choose the field name in your mailing list data source. Repeat as necessary. 4. Choose OK. Step 6: Preview and print the envelopes Do a final check before you print the envelopes. 1. Choose Preview Results, and then choose the Next or Previous record button to make sure the names and addresses on all the envelopes look right. Tip: To go to the start of the list, choose the First record button, and to go to the end of the list, choose the Last record button. 2. Choose Finish & Merge > Print Documents. Step 7: Save your mail merge envelope document When you save the mail merge envelope document, it stays connected to your mailing list so that you can use it for your next bulk mailing. To reuse your envelope mail merge document • Open the mail merge document for envelopes and choose Yes when Word prompts you to keep the connection. To change addresses in the envelope mail merge document • Open the mail merge document for envelopes and choose Edit Recipient List to sort, filter, and choose specific addresses. --------------------------------------------------------------------------------------------------------------------------------------------------- VIII How will you use Mail Merge in Open Office WriterStep 1 To create letter in writer or Exiting browse step 2 Go tools option Then select mail merge wizard. The box appear 1.Select current document. Click next 2. To select a letter option. Click next 3. To select Insert Address list option. Dialog box appear go to dialog box. Selected different address list create->customize->which filed u want the select other fields delete and give ok. 4. To type new address list then ok 5. To save Address list. 6. To click the address block 7. The option will be work. 8. To the click more option. 9. To match the fields. 10. To address to appear in the preview box. 11. To click next 12.Create salutation then click next. 13. To all options is correct so u click next and next. 14. Then you want individual letter you click edit individual option. 15. Click Next option. 16.To save the letter. 17.Click finish. 18.The mail merge option complete to view the addresses in current window. ----------------------------------------------------------------------------------------------- IX Create an advertisementGetting Started in Microsoft Word for Ads 1. Open Microsoft Word. 2. Click on File. 3. Click on New - The page with the templates appears or you could choose Blank Page to start an ad without any preformatted boxes. 4. Click on Flyers, or Brochures, or Newsletters. ... 5. Click on one of the choices provided. X Prepare a resume.Step 1: To create a resume, open Microsoft Word 2010 and locate the File tab. Select New from the drop-down menu. 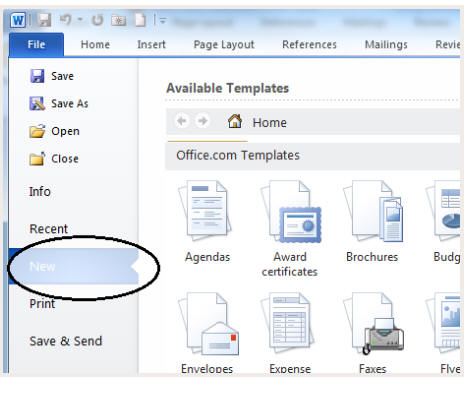 Step 2: Under Office.com Templates, select Resumes and CVs. 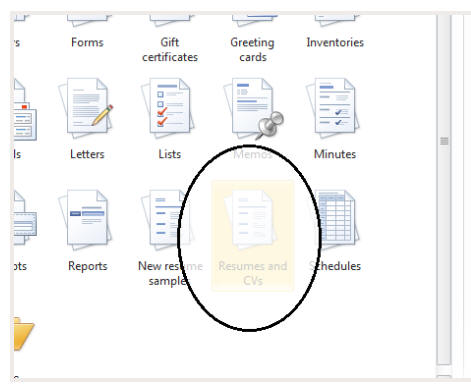 Step 3: In this example, we will choose a template from the Job-specific resumes folder. You may also choose from Basic resumes or Situation-specific resumes, shown below. 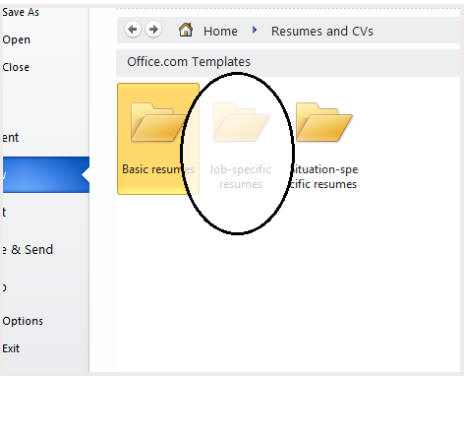 Step 4: Within the Job-specific resumes folder folder, select the template that most closely relates to the position for which you are applying. 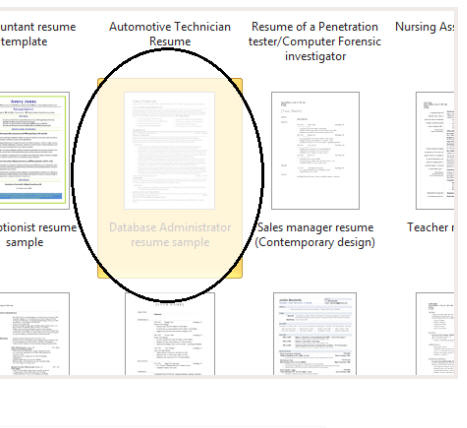 Step 5: You will now see a prepopulated sample. To replace this information with your own, simply highlight the portion of text you wish to replace and type in your own information to customize your resume. Replace the remaining text with your own information. 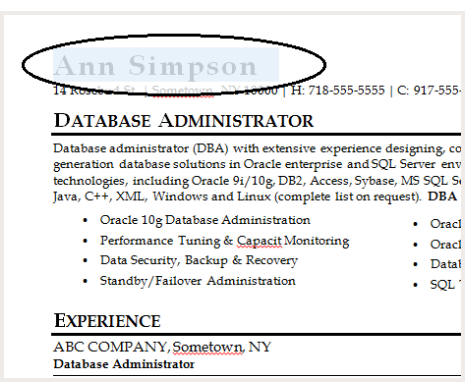 ------------------------------------------------------------------------------------------------------------------------------------------------------- XI Use the data consolidate command In open office calcOpen the document that contains the cell ranges to be consolidated. Choose Data - Consolidate to open the Consolidate dialog. From the Source data area box select a source cell range to consolidate with other areas. If the range is not named, click in the field next to the Source data area. A blinking text cursor appears. Type a reference for the first source data range or select the range with the mouse. Click Add to insert the selected range in the Consolidation areas field. Select additional ranges and click Add after each selection. Specify where you want to display the result by selecting a target range from the Copy results to box. If the target range is not named, click in the field next to Copy results to and enter the reference of the target range. Alternatively, you can select the range using the mouse or position the cursor in the top left cell of the target range. Select a function from the Function box. The function specifies how the values of the consolidation ranges are linked. The "Sum" function is the default setting. Click OK to consolidate the ranges. --------------------------------------------------------------------------------------------------------------------------------- Question: Create a Table of Contents — OpenOfficeStep 1:Open your document in OpenOffice 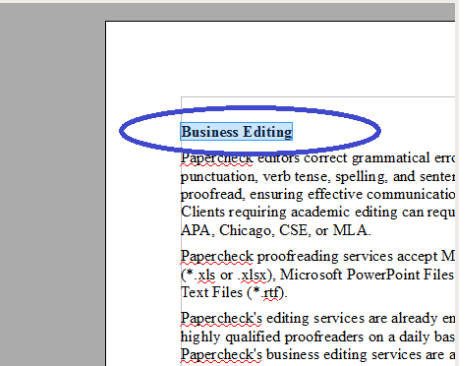 Step 2:
Highlight the first heading that you would like to include in your table of contents. 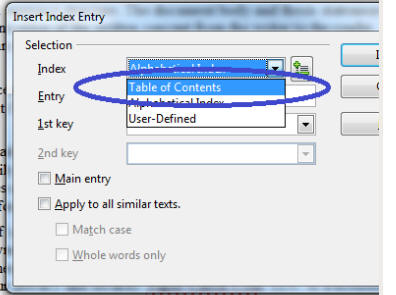 Step 3:
Click Insert in the toolbar at the top of the screen and scroll to find Indexes and Tables. 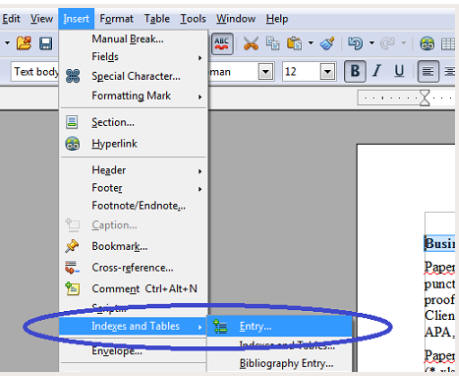 Step 4:
Select Entry. Step 5: In the screenshot below, note that the window has popped up. Check that the text which you would like to set as your heading is in the box labeled Entry and that the level is marked 1. Step 6: Click Insert to set this text as a heading. Step 7: Notice that in the screenshot below, the heading has a gray shadow. With the dialog box open, select your next heading. Step 8: You will see that the text in the Entry box has been replaced with the text for the second heading. Select insert to create this heading. Follow steps 2–8 to identify the remaining headings. Step 9: Once you have identified all of the headings, close the dialog box. Step 10: Under the Insert menu, select Indexes and Tables and then Indexes and Tables. Step 11: In the screenshot below, a window has popped up. Select Table of Contents in the Type menu and type the name of your table of contents. ---------------------------------------------------------------------------------------------------- XII Import and export data in Open Office-BaseExporting data from Base You copy a table from Base to a new Calc sheet, then you can save or export the data to any file format that Calc supports. Open the database file that contains the database table to be exported. Click Tables to view the tables, or click Queries to view the queries. Choose File - New - Spreadsheet. In the Base window, right-click the name of the table to export. Choose Copy from the context menu. Click cell A1 in the new Calc window, then choose Edit - Paste. Now you can save or export the data to many file types. Importing data to Base Note.png You can import text files, spreadsheet files, and your system address book in read-only mode only. Note.png When you import from a text or spreadsheet file, the file must have a first row of header information. The second row of the file is the first valid data row. The format of every field in the second row determines the format for the entire column. Any format information from a spreadsheet file gets lost when importing to Base. Note.png For example, to ensure the first column has a text format, you must make sure that the first field of the first valid data row contains text. If a field in the first valid data row contains a number, the whole column is set to number format, and only numbers, no text, will be shown in that column. Open a Base file of the database type that you want. Either create a new Base file using the Database Wizard, or open any existing Base file that is not read-only. Open the Calc file that contains the data to be imported to Base. You can open a *.dbf dBASE file or many other file types. Select the data to be copied to Base. You can enter a range reference like A1:X500 in the Name Box if you don't want to scroll. If you copy a dBASE sheet, include the top row that contains the header data. Choose Edit - Copy. In the Base window, click Tables to view the tables. In the Base window, choose Edit - Paste. You see the Copy Table dialog. Most databases need a primary key, so you may want to check the Create primary key box. ---------------------------------------------------------------------------------------------------------------------------------- XIII Creating a new style using the Style dialog box
Open the Styles and Formatting window. Right-click on a style and select New. The style that you choose will be the basis for this new style. If you do not want too many of the options preset for you, choose the Default style.
The dialog box displayed depends on the type of style selected. The figure below shows an example of a Style dialog box for a new paragraph style. The dialog boxes and choices for defining new styles are the same as for modifying existing styles. Tip.png An exception to the above rule is conditional styles, which have a different dialog box. See Working with conditional paragraph styles for more information. Linking styles You can link a new style to an existing style. For example, suppose that the style mystyle specifies a font size of 12. Then you create another style (mystyle2) linked to mystyle and specifies underlined text. If you modify mystyle to font size 20, mystyle2 inherits the new font size but still underlines the text. Linking styles 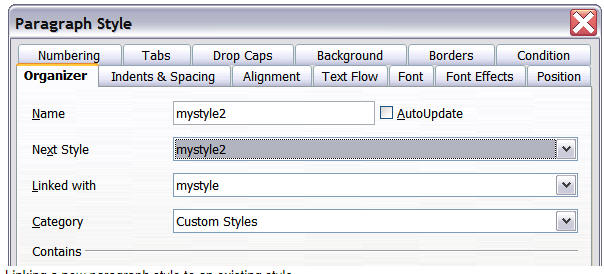
Linking a new paragraph style to an existing style. Tip.png If styles are linked, changing the base style changes all the linked styles. Sometimes this is exactly what you want; other times it is not. It pays to plan ahead. Many predefined styles are already linked to other styles. Creating a new style from a selection You can create a new style from the formatting of an object in the current document. For instance, you can change the formatting of a paragraph or frame until it appears as you like, and then you can turn that object's formatting into a new style. This procedure can save time, because you do not have to create a new style as described above and remember all of the formatting settings. Change the formatting of the object (paragraph, frame, etc) to your liking. Open the Styles and Formatting window. From the icons at the top of the window, choose the type of style to create (paragraph, character, and so on). In the document, select the item to save as a style. In the Styles and Formatting window, click the New Style from Selection icon. In the Create Style dialog box, type a name for the new style. The list shows the names of existing custom styles of the selected type, if any. Click OK to save the new style. Dragging and dropping a selection to create a style You can drag and drop a text selection into the Styles and Formatting window to create a new style. Open the Styles and Formatting window. Select some text and drag it to the Styles and Formatting window. In the Create Style dialog box, type a name for the new style. The list shows the names of existing custom styles of the selected type, if any. Click OK to save the new style. If the Paragraph Styles list is showing in the Styles and Formatting window, a new paragraph style will be added to the list. If Character Styles are active, the character style will be added to the list. -------------------------------------------------------------------------------------------------------------------------------------- XIV Slide transitions
Slide transitions are the effects that take place when one slide gives way to the next one in the presentation, like Roll down from top or Fly in from left. They add dynamic flair to a slideshow, smoothing the transition between slides.
You can add transitions while in Slide Sorter view or in Normal view. To see the effect of a selection, you need to be in Normal view and select the Automatic preview checkbox on the Slide Transition page of the Tasks pane. You can apply a single type of transition to all slides in the presentation or apply a different transition to any single slide, even having a different transition for every slide in the show. While using many different transitions may be fun to do, it may not give your show a professional appearance. Tip.png If you want most of the slides to have the same transition, but a few to be different, you may find it easiest to apply one transition to all slides and then change only the ones you want to be different. Setting the timing of automatic slide changes You can set up a slide show to run automatically, either unattended or while you speak. To set the default time for slides to be displayed before changing to the next slide, go to the Slide Transition pane, leave the transition effect set to No Transition, choose Automatically after in the Advance slide section, set a time, and click the Apply to All Slides button. To vary the times for some slides, choose Slide Show > Rehearse Timings from the menu bar, or click the Rehearse Timings icon on the Slide Show toolbar. The slide show begins in full-screen mode, and a timer appears in the lower left-hand corner of the screen. When you want to advance to the next slide, click the timer. To keep the default setting for this slide, click the slide, not the timer. Continue for all slides in your presentation. Impress records the display time for each slide. Save your presentation. When you next look at the time set under Automatically after, you will see that the times have changed to match what you set when rehearsing. If you want the whole presentation to auto-repeat, open the menu Slide Show > Slide Show Settings. Click Auto and OK. Applying a slide transition effect In the Tasks pane, choose Slide Transition. In the Slides pane or Slide Sorter view, select the slides to which you want to apply the transition. If you want the transition to apply to all slides, you do not need to select them first. In the Apply to selected slides list, select a transition. Modify the selected transition by changing the speed or adding a sound, in the Modify transition area. If you choose to play a sound, select it in the Sound list. The Loop until next sound checkbox now becomes active. Select this checkbox to play the sound repeatedly until another sound starts. Choose how to advance to the next slide: manually (on mouse click) or automatically. If you choose automatically, you can specify how long the slide remains visible before it automatically advances to the next slide. If you want the effect you just defined to apply to all slides in the show, click the Apply to All Slides button. To preview the transition effect, click the Play button. To start the slide show from the current slide (so you can see all the transitions), click the Slide Show button. 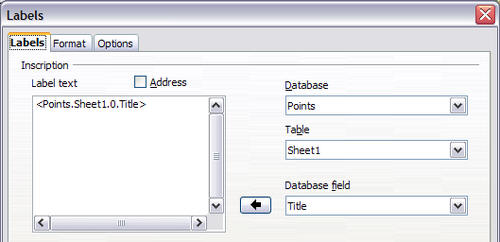 Task pane, showing Slide Transition page. Removing a transition effect Select the desired slides. Choose No Transition in the list on the Slide Transition page of the Tasks pane. Question: How to Change Slide Size in LibreOffice Impress?How to Change Slide Size in LibreOffice Impress? HOW TO CREATE A TABLE IN LIBRE OFFICE BASE? |
|
|
Maintain User accounts in Linux Maintain User accounts in Linux |
|